
I’ll admit it…….I talk to my plants! I love to nurture them and watch them grow! Starting seeds indoors is a great way to save money and watch your babies grow up! I am going to run through the steps of sowing seeds indoors from the initial set-up through planting them in the garden.
My house is loaded with windows allowing sunlight to flood in from the east, south, and west, so basically all day. This gives me the freedom to avoid heat mats as well as sun lamps. If you do not have sufficient sunlight in your home or if you set-up a seed starting area in your basement, you will need heat mats and sun lamps. You can find these at most home/garden centers or online.
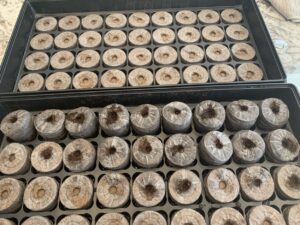
This year I stumbled on these Jiffy Professional Greenhouses for seed starting. They come with 36 Peat Pellets, a tray, and a clear greenhouse top. These pods were easy and fun to use. As you can see in the first picture on the left, once you add water to the pods they expand, doubling in size to accommodate seedling growth (Fun to watch!). When the pods are completely expanded gently pull back the netting on the top of the pellets (See Photo on the right).
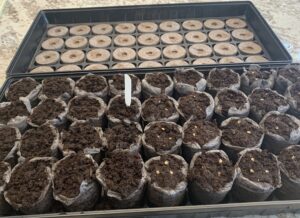 . Now you’re ready to plant your seeds. Because seeds are so tiny they are easy to drop (especially for me!?). These seedlings are heirloom tomatoes given to me by my brother-in-law last summer. We enjoyed these tomatoes quite a bit especially in homemade salsa! I saved the seeds over the winter and they yielded 36 plants for 2020! Needless to say, I’ve been giving everyone I know tomato plants because I do not have room for 36 plants in my own garden.
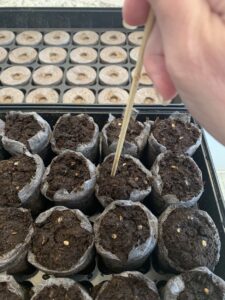
I sowed 3 seeds per pellet, and then gently pushed them down about 1/4 inch with a wooden barbecue skewer (see below). Then I covered with loose soil from within the pellet.
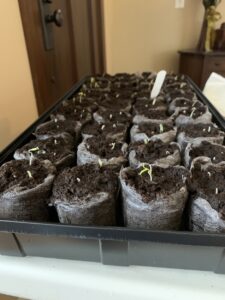
Cover the pellets with the clear greenhouse top. Keep covered and in a darker area (no need for lamp or sunlight yet, but heat mat is recommended) until seedlings begin to sprout. I used a spray water bottle to lightly mist the pellets for a few days because the pellets hold on to much of the water that I added in the initial set-up. As seedlings emerge typically between 5-10 days (See picture below on the left at 5 days), remove the greenhouse top and move the tray to a sunny window or under a sun lamp. You can remove the heat mat at this point.
Water your seedlings daily, paying attention to levels of moisture and dryness. Keep them moist without overwatering. When you see they are dry again, it’s time to water.
It’s amazing to see how quickly these little guys grow. In the next picture you can see how much they grew by day 12. Notice I cut back the weaker of seedlings ?. You want to thin back to just one seedling per pellet.
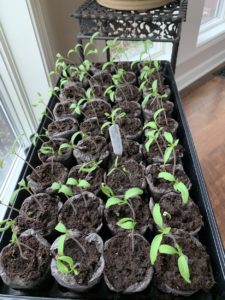
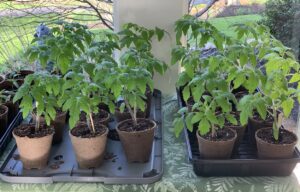
I started these seedlings 8 weeks before the last frost date for my area, so they quickly outgrew the initial pellets. Had I waited to start them closer to the plant date, I could have left them in the pellets, planting the pellets directly into the garden once the fear of frost had passed. In this case, I have to give them a larger home as demonstrated below.
Before exposure to direct outdoor sunlight, you will want to harden off your plants a few days before planting by placing them in a shady spot during the day and bringing them inside at night. Otherwise, you risk shocking your plants with heat, wind, and rain.
After the fear of frost in your time zone (https://www.pinterest.com/pin/80290805833551111/), you’re ready to dig in the dirt!!